Sweet Simplicity: No-Bake Dessert Jar Recipes Everyone Will Love
Quick & Classy: No-Bake Dessert Jars for Effortless Entertaining
No-Bake Dessert Jar Recipes are the perfect solution for serving a crowd-pleasing treat without ever turning on the oven. Layered with delicious flavors in portable glass jars, they effortlessly blend simplicity with sophistication, making them an ideal choice for warm-weather celebrations. These individual desserts not only save time but also keep your kitchen cool during heat waves, offering a refreshing alternative to traditional baked treats.
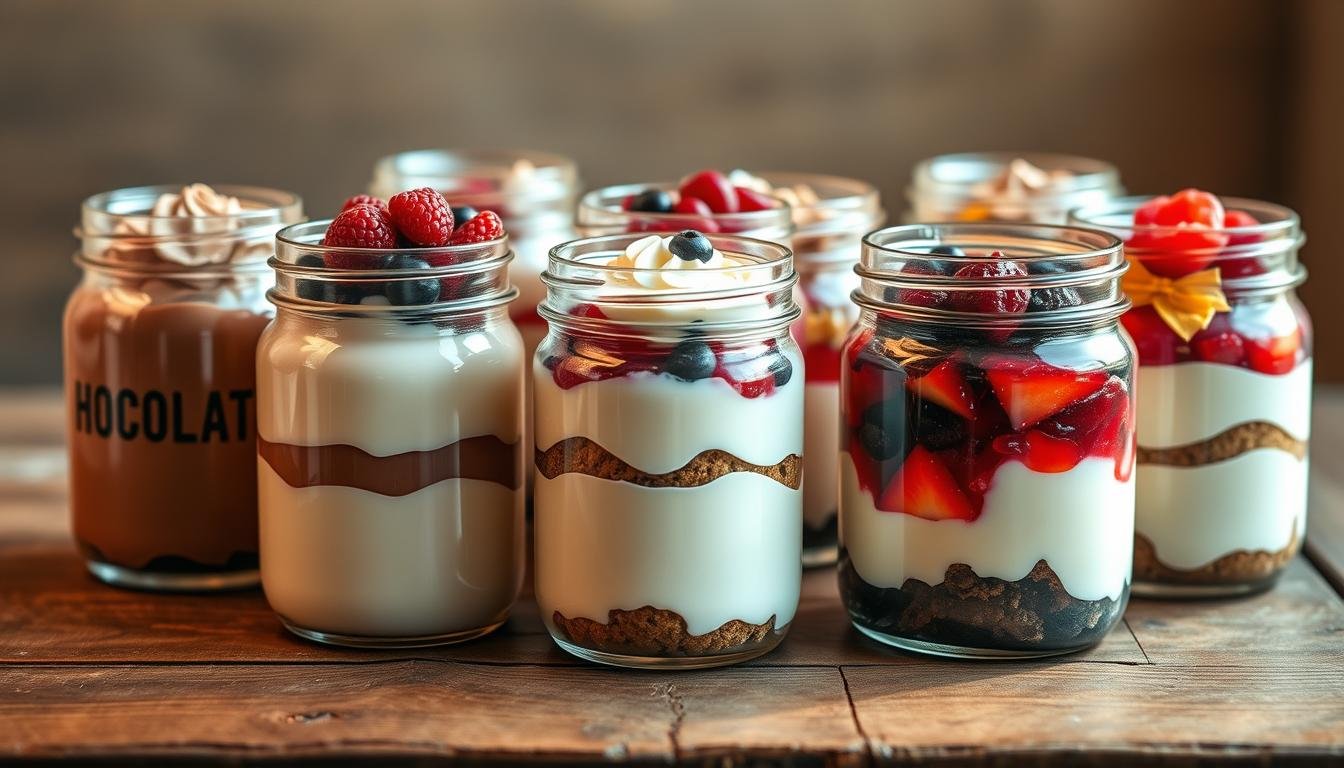
Mason jars transform ordinary sweets into eye-catching masterpieces. Their compact size ensures perfect portions while adding rustic charm to picnics or dinner parties. Creamy chocolate cheesecake layers or fruity parfaits shine through the glass, inviting guests to admire every detail before taking a bite.
Summer gatherings demand hassle-free solutions. Pre-assembled jars allow hosts to focus on entertaining rather than last-minute prep. Guests love the convenience of grabbing their ready-to-enjoy treat – no slicing or plating required. Plus, leftovers stay fresh when sealed tightly.
Versatility defines these creations. Swap ingredients seasonally or tailor flavors to match event themes. From Fourth of July barbecues to bridal showers, this approach adapts effortlessly. The result? A stress-free, crowd-friendly option that balances practicality with flair.
Introduction
Individual-sized layers in clear jars bring both visual appeal and effortless preparation to the table. These portable creations combine convenience with elegance, offering a modern twist on classic flavors. From summer picnics to indoor gatherings, their adaptability makes them a go-to solution for hosts.
Popular options like cheesecakes and citrus-infused pies thrive in jar formats. Creamy textures pair with crumbly crusts, while fresh berries or chocolate shavings add contrast. Pre-portioned servings eliminate guesswork, letting guests enjoy balanced bites every time.
| Dessert Type | Key Ingredients | Prep Time |
|---|---|---|
| Layered Cheesecakes | Cream cheese, graham crackers | 20 mins |
| Fruit Parfaits | Greek yogurt, seasonal berries | 15 mins |
| Chocolate Mousse | Whipped cream, cocoa powder | 25 mins |
The variety spans light citrus options to rich cocoa-based indulgences. Tiramisu truffles or peach melba adaptations demonstrate how traditional recipes shine in compact formats. Cooler-friendly designs ensure treats stay intact during travel.
This guide explores flavor combinations, texture contrasts, and storage hacks. Learn to craft crowd-pleasers that align with seasonal themes or dietary preferences, all without preheating an oven.
The Unique Appeal of No-Bake Desserts
No-bake options revolutionize summer gatherings by eliminating heat and hassle. These creations thrive in warm weather, keeping kitchens cool while delivering crave-worthy flavors. Their popularity stems from adaptability; whether crafting a velvety cheesecake or a rich chocolate mousse, the process remains refreshingly simple.
Why Choose No-Bake?
Oven-free recipes save time and reduce cleanup. Unlike traditional baking, there’s no waiting for preheating or monitoring cook times. A blogger from Sweet Creations Daily notes: “I prep 12 chocolate-filled jars in 25 minutes, half the time of a layered cake.”
Benefits of Dessert Jars
Portable glass containers enhance both practicality and presentation. Individual servings prevent portion disputes, while transparent walls showcase layered textures. Hosts appreciate how cheesecake bases stay crisp for hours, unlike soggy pie crusts.
| Aspect | No-Bake Desserts | Traditional Desserts |
|---|---|---|
| Preparation Time | 15–30 mins | 45–90 mins |
| Cleanup Effort | Minimal | Multiple Bowls/Pans |
| Portability | High (Sealed Jars) | Limited |
Testimonials highlight their charm: One pastry chef reports a 40% increase in event bookings after adding jarred tiramisu to menus. Seasonal fruits or crushed cookies adapt effortlessly to themes, proving their versatility.
No-bake dessert recipes, easy dessert jars, quick sweet treats,
Transform ordinary ingredients into showstopping layers with minimal effort. Luscious French silk pies and zesty citrus parfaits prove that flavor complexity doesn’t require lengthy prep. These creations prioritize smart layering over technical skills, making gourmet results achievable for home cooks.
Four crowd favorites dominate the jar scene: velvety cheesecakes, airy mousses, fruit-forward parfaits, and nostalgic cereal treats. Each category offers multiple variations—swap raspberries for blackberries in yogurt layers or mix crushed peppermint into chocolate ganache during holidays.
| Recipe | Main Components | Active Time |
|---|---|---|
| French Silk Pie | Whipped chocolate, cookie crust | 18 mins |
| Berry Cheesecakes | Cream cheese, graham crumbs | 22 mins |
| Chocolate Mousse | Heavy cream, cocoa powder | 15 mins |
| Key Lime Cereal | Citrus zest, crispy base | 12 mins |
Newcomers excel with these formulas since precision matters less than enthusiasm. “My first attempt at layered caramel apple trifles looked professional,” shares a home cook from Texas. Transparent jars forgive uneven layers while highlighting vibrant colors.
Texture contrasts elevate simple combinations. Crunchy granola under smooth pumpkin custard or silky panna cotta topped with tart berries creates memorable bites. These adaptable formulas let hosts showcase personal flair without advanced techniques.
Exploring Easy Dessert Jar Variations
Endless possibilities emerge when crafting single-serving delights in portable glassware. From airy fruit medleys to creamy indulgences, these creations cater to diverse tastes while maintaining their mini format. Seasonal ingredients and clever layering techniques unlock a world of flavor combinations.
Layered Parfaits vs. Cheesecakes
Parfaits charm with their lightness, often featuring Greek yogurt or whipped cream layered with summer berries and granola. Cheesecake versions deliver richness through velvety cream cheese blends atop crumbly crusts. While parfaits excel in freshness, cheesecakes offer decadence in every spoonful.
Flavor Pairings and Inspirations
Food bloggers recommend zesty twists for warm-weather gatherings. Try lime zest in cheese-based fillings or mint-infused watermelon cubes in parfaits. One influencer suggests layering mango puree with coconut cream for tropical flair. Garnishes like edible flowers or toasted nuts elevate visual appeal without extra effort.
For mini portions that shine, alternate colorful ingredients like purple blackberries and golden pineapple chunks. A drizzle of honey between layers adds sweetness while complementing tart fruits. These strategies transform simple components into summer-ready masterpieces that delight both eyes and palates.
No-Bake Cheesecakes in Jars: Tips and Tricks
Mastering jarred cheesecakes starts with foundational techniques that ensure stability and flavor balance. Proper crust formation and filling consistency separate amateur attempts from professional-quality results.
Crust Preparation Secrets
Crushed cookies form the backbone of exceptional textures. Pulse graham crackers or Oreos in a food processor until sandy, then mix with melted butter. Freeze the mixture for 10 minutes before layering – this prevents crumbling when adding creamy components.
| Base Ingredient | Binding Agent | Prep Time |
|---|---|---|
| Graham Crackers | Melted Butter | 8 mins |
| Oreo Cookies | Coconut Oil | 6 mins |
| Toasted Nuts | Maple Syrup | 12 mins |
Achieving the Perfect Texture
Whip softened cream cheese with a hand mixer for 90 seconds to eliminate lumps. Gradually add condensed milk while blending; this creates airy fillings that hold their shape. Chill mixtures for at least an hour before assembling to maintain distinct layers.
Time management proves crucial. Alternate freezing crusts and refrigerating fillings while prepping other components. This staggered approach ensures each element sets properly without extending total prep time.
For flawless presentation, use piping bags to add fillings gently. Press layers with the back of a spoon to remove air pockets. Seal finished cheesecakes tightly and refrigerate overnight for optimal texture development.
No-Bake Cheesecakes in Jars: A Simple & Delicious Dessert for Two
Indulge in a creamy, no-bake cheesecake served in individual jars, making it the perfect sweet treat for two. This easy recipe combines a buttery graham cracker crust with a rich, smooth cheesecake filling, topped with your favorite fruit or sauce. No oven needed, just chill and enjoy!
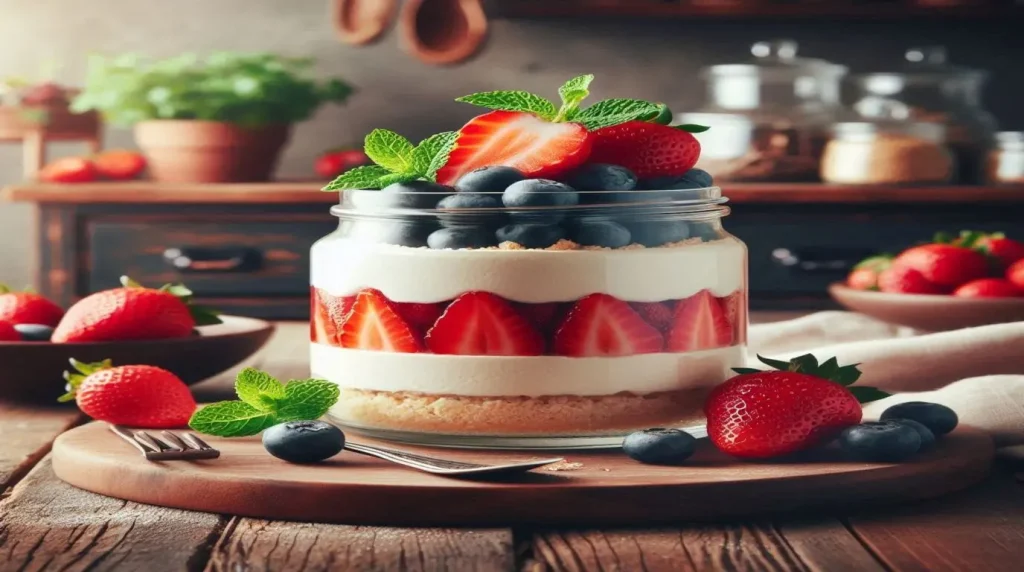
Ingredients (for 2 servings):
- 1/2 cup graham cracker crumbs
- 3 tbsp melted butter
- 1/4 cup sugar
- 1/2 cup cream cheese (softened)
- 1/4 cup heavy cream
- 2 tbsp powdered sugar
- 1/2 tsp vanilla extract
- Fresh berries (optional, for topping)
Prep Instructions:
- Make the crust: In a small bowl, combine graham cracker crumbs, melted butter, and sugar. Mix well until the crumbs are evenly coated. Spoon the mixture into two small jars or glasses, pressing down to form a firm crust layer.
- Prepare the filling: In a separate bowl, beat the softened cream cheese until smooth. Add the powdered sugar, heavy cream, and vanilla extract, and mix until everything is well combined and creamy.
- Assemble: Spoon the cheesecake filling into the jars on top of the graham cracker crust. Smooth the top with a spoon or spatula.
- Chill: Refrigerate for at least 2 hours (or overnight) to allow the cheesecake to firm up.
- Serve: Top with fresh berries or your favorite fruit sauce before serving.
Pro Tip:
For a more indulgent flavor, drizzle your cheesecake jars with a homemade berry compote or caramel sauce before serving to elevate the taste and presentation!
Delightful Chocolate Creations in Jars
Chocolate lovers rejoice, these layered indulgences deliver intense flavor without baking. Creamy mousse meets crunchy bases in portable glassware, creating irresistible contrasts. Cocoa-based recipes shine through strategic layering, transforming simple ingredients into luxurious bites.
Tiramisu reinvented for jars combines espresso-soaked ladyfingers with chocolate ganache. Silky mascarpone balances bitter coffee notes, while cocoa dusting adds visual drama. For deeper richness, try a triple-layer chocolate pie variation with cookie crumbles and whipped cream.
Four standout formulas dominate this category:
- Molten lava cakes with gooey centers
- Avocado-chocolate pudding with coconut flakes
- Peanut butter mousse cheesecakes
- White chocolate raspberry parfaits
Texture plays starring roles in these recipes. Crushed pretzels add salty crunch beneath velvety truffle fillings. A food blogger notes: “My chocolate-covered strawberry jars get rave reviews for their striped layers.” Mix-ins like toasted hazelnuts or orange zest elevate standard combinations.
| Creation | Key Components | Prep Time |
|---|---|---|
| Fudge Pie | Condensed milk, cocoa powder | 18 mins |
| Mocha Tiramisu | Espresso, ladyfingers | 25 mins |
| Cookie Dough | Chocolate chips, edible dough | 12 mins |
For intense flavor, melt premium dark chocolate into bases. Chill mixtures thoroughly between layers to maintain definition. Garnish with gold leaf or chocolate curls before serving for special occasions.
Delightful Chocolate Creations in Jars: A Decadent Dessert for Two
Treat yourself and a loved one to these indulgent chocolate creations served in jars. With layers of rich chocolate mousse and a touch of sweetness, this no-bake dessert is simple to prepare and guaranteed to satisfy any chocolate craving.
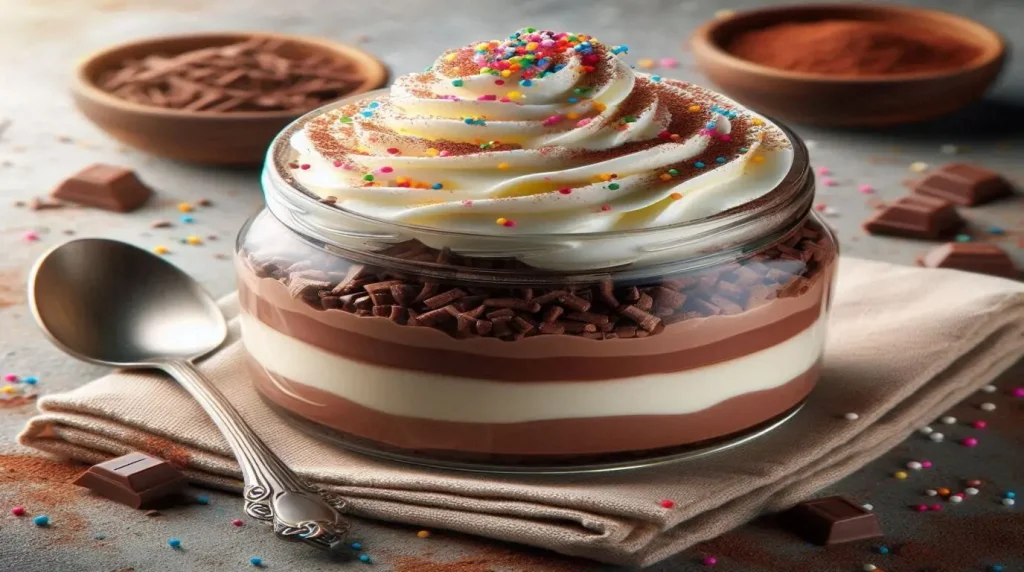
Ingredients (for 2 servings):
- 1/2 cup heavy cream
- 1/4 cup dark chocolate (chopped)
- 2 tbsp sugar
- 1 tsp vanilla extract
- 2 tbsp crushed cookies or graham crackers (optional, for added crunch)
- Chocolate shavings or cocoa powder (for garnish)
Prep Instructions:
- Melt the chocolate: In a small saucepan, heat the heavy cream over medium heat until it begins to simmer. Remove from the heat and add the chopped dark chocolate. Stir until smooth and fully melted.
- Whip the mousse: Allow the chocolate mixture to cool slightly, then add sugar and vanilla extract. Beat with a hand mixer or whisk until it thickens and becomes mousse-like in texture.
- Layer the jars: Spoon a layer of crushed cookies or graham crackers into the bottom of two jars. Follow with a generous layer of the chocolate mousse.
- Chill: Refrigerate the jars for at least 1 hour to allow the mousse to set and develop its rich flavor.
- Serve: Garnish with chocolate shavings or a dusting of cocoa powder before serving.
Pro Tip:
For extra flavor, try adding a small splash of coffee or espresso powder to the chocolate mixture to enhance the chocolate’s depth and richness.
Fruit-Infused Desserts: Key Lime, Peach, and Berry Options
Harness the zesty punch of citrus and the sweetness of ripe berries for refreshing layered creations. Seasonal fruits like peaches and blackberries elevate simple formulas into vibrant food art, while lemon or lime zest cuts through rich bases. These combinations celebrate summer’s bounty with every spoonful.
Mini key lime pie jars exemplify this balance. Graham cracker crumbs anchor tangy lime curd blended with whipped cream cheese. A Texas food blogger shares: “Using fresh-squeezed juice makes the citrus flavor pop against the creamy layer.” For peach variations, swirl diced fruit into vanilla custard or Greek yogurt.
Berry medleys offer versatility. Alternate raspberry puree with lemon-infused mascarpone for striking stripes. Blueberry compote layered over almond crumble creates a textural contrast. In-season produce ensures brighter flavors and firmer textures that hold up in glass containers.
| Creation | Key Components | Prep Time |
|---|---|---|
| Key Lime Pie | Lime zest, cream cheese | 20 mins |
| Peach Parfait | Fresh peaches, granola | 15 mins |
| Berry Medley | Mixed berries, lemon cream | 18 mins |
Citrus elements like lemon juice or orange zest prevent cloying sweetness. A drizzle of honey-glazed blueberries adds glossy appeal, while mint leaves provide final freshness. These food-forward designs turn simple ingredients into edible sunshine.
Fruit-Infused Desserts: Key Lime, Peach, and Berry Options for Two
Enjoy a refreshing twist on classic desserts with these fruit-infused treats. From tangy key lime to sweet peach and juicy berries, these no-bake desserts are a perfect balance of fruity goodness and creamy indulgence, served conveniently in jars for a delightful presentation.
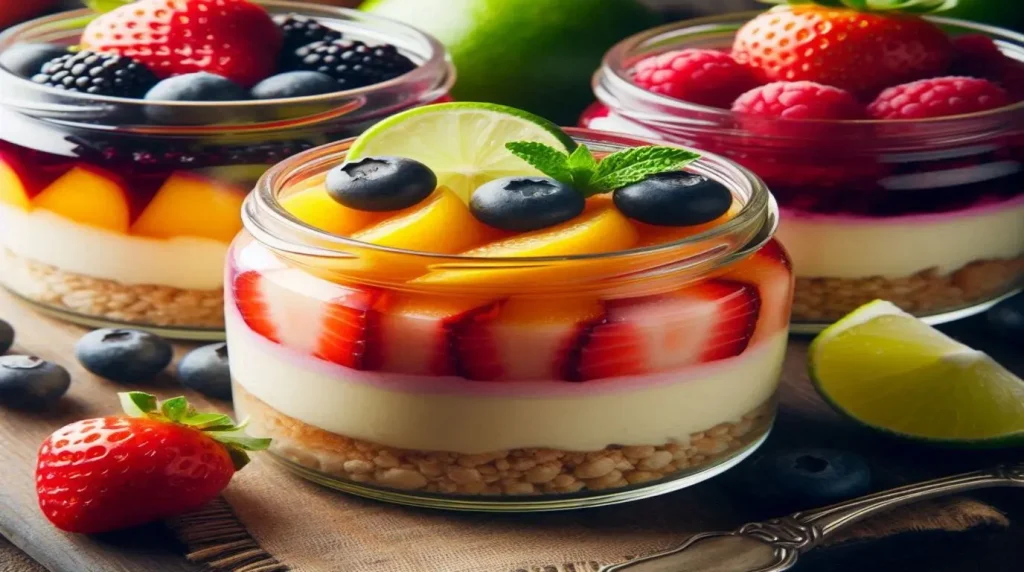
Ingredients (for 2 servings):
- 1/2 cup key lime juice (or peach puree, or mixed berry puree)
- 1/2 cup cream cheese (softened)
- 1/4 cup heavy cream
- 2 tbsp powdered sugar
- 1/4 tsp vanilla extract
- 1/4 cup graham cracker crumbs (for crust)
- 2 tbsp melted butter
- Fresh fruit (lime slices, peach slices, or mixed berries, for topping)
Prep Instructions:
- Make the crust: In a small bowl, mix the graham cracker crumbs with melted butter until the crumbs are evenly coated. Spoon the mixture into the bottom of two jars, pressing down to form a firm crust.
- Prepare the filling: In another bowl, beat the cream cheese until smooth. Add the heavy cream, powdered sugar, and vanilla extract, and mix until the filling is creamy. Add your fruit juice or puree (key lime, peach, or berry) and mix until fully incorporated.
- Assemble: Spoon the cream mixture into the jars over the graham cracker crust, smoothing the top with a spatula.
- Chill: Refrigerate the jars for at least 2 hours to allow the flavors to set.
- Serve: Top with fresh fruit slices or berries for added texture and flavor.
Pro Tip:
For a zesty kick, add a teaspoon of lime zest (for Key Lime) or finely chopped fresh mint (for Berry) into the filling mixture before chilling. It will enhance the fruity flavor and add a fresh aroma!
Seasonal Sweet Treats: Summer Inspirations
Summer’s warmth calls for creations that refresh as much as they delight. Little mason jars become edible canvases for seasonal flavors, combining practicality with sun-kissed charm. Citrus-infused layers and jewel-toned berries shine in these portable formats, offering relief from the heat without heavy textures.
Refreshing ingredients dominate warm-weather formulas. Think chilled mango sorbet layered with coconut flakes or berry lemon shortcake crumbles. A Michigan caterer shares: “Clients request watermelon cake jars weekly during July, they’re hydrating and festive.” These combinations prioritize cool, crisp elements that align with outdoor dining.
Four standout summer inspirations:
- Mini Key Lime Delights with toasted meringue
- Peach Melba parfaits featuring vanilla bean custard
- Angel food cake cubes with macerated strawberries
- Frozen piña colada blends in tropical-themed jars
Little mason jars excel at portion control for poolside parties or barbecues. Their compact size prevents overindulgence while letting guests sample multiple flavors. Angel food cake adaptations prove particularly popular, airy cubes soak up fruit juices without becoming soggy, maintaining their cloud-like texture.
Personalization elevates these warm-weather offerings. Tie raffia around jar necks or add custom tags matching event color schemes. A sprinkle of edible glitter or fresh mint leaves transforms simple recipes into Instagram-ready masterpieces.
Creative Uses for Mason Jars in Desserts
Mason jars redefine dessert artistry through their dual role as functional tools and decorative canvases. Beyond preserving jams, these glass containers now host layered masterpieces that merge practicality with visual storytelling. Their stackable design makes them ideal for themed parties or edible gifts requiring effortless transport.
Transform ordinary mason jars into showpieces with these techniques:
| Use Case | Key Elements | Occasion |
|---|---|---|
| Themed Parties | Edible glitter, patterned lids | Birthdays/Weddings |
| Edible Gifts | Handwritten recipe tags | Holidays |
| Seasonal Displays | Fresh flowers as toppers | Farmers Markets |
For rustic charm, layer graham cracker crust with lemon curd and top with sugared violets. A Texas baker shares: “Clients adore our cactus-shaped white chocolate garnishes on southwest-themed jars.” Use chalkboard paint on lids for customizable labels that match event color schemes.
Mason jars excel at layered presentations. Alternate peach slices with vanilla bean custard, finishing with caramel drizzle visible through the glass. Their airtight seals keep graham cracker crust bases crisp during picnics or outdoor weddings.
Innovative adaptations include:
- Attaching honey dippers to jar lids for sticky desserts
- Freezing layered creations into portable popsicle molds
- Suspending jars with twine for hanging dessert displays
These versatile containers prove presentation matters as much as flavor. Whether crafting individual portions or family-style servings, mason jars turn everyday treats into memorable experiences.
DIY Dessert Jar Crafting and Presentation Ideas
Turn ordinary glass containers into edible masterpieces through strategic design choices. Start with cream cheese-based fillings layered between textured elements like toasted coconut or crushed pretzels. Use piping bags for precise placement, ensuring each ingredient remains visible through the jar’s walls.
Creative tools elevate assembly efficiency. Try angled spatulas for smooth layers or silicone molds to shape decorative chocolate garnishes. For mini bake-inspired portions, alternate lemon curd with crumbled shortbread in 4-ounce jars. Edible flowers or gold leaf add instant sophistication to fruit-topped creations.
Gifting-ready jars demand thoughtful packaging. Tie raffia around lids and attach handwritten flavor tags using twine. Layer components in this order for visual impact:
- Crunchy base (graham crackers or granola)
- Cream cheese mixture or custard
- Fresh fruit compote
- Whipped topping with garnish
Personalization transforms standard recipes into memorable offerings. Monogrammed jar labels or themed toppers (like tiny beach umbrellas for summer events) create Instagram-worthy presentations. For bake cheesecake enthusiasts, include pre-baked crusts in gift sets with recipe cards.
Step-by-Step Guide to Making No-Bake Desserts
Crafting layered creations requires precise techniques that balance flavor and texture. Begin by gathering ingredients like softened cream cheese, chilled whipped toppings, and your choice of crust components. Proper preparation ensures smooth assembly and professional results.
Mixing Ingredients and Assembly
Room-temperature cream cheese blends seamlessly with other components. Use a hand mixer on medium speed for 2 minutes to eliminate lumps. Gradually add powdered sugar or honey for sweetness, then fold in whipped cream using a spatula to maintain airiness.
| Step | Tools Needed | Pro Tip |
|---|---|---|
| Crush Base | Food processor | Freeze crumbs for 10 mins |
| Whip Fillings | Stand mixer | Chill the bowl first |
| Layer Components | Piping bag | Tap jars gently |
For angel food variations, cube store-bought cake and alternate with berry compote. Chill assembled jars 45 minutes before serving to let flavors meld. Garnish with mint sprigs or chocolate curls for visual impact.
An easy make approach works best: prepare the bases first, then fillings. Use wide-mouth containers for clean layering. Wipe jar edges after each addition for a polished presentation. Serve with long spoons to reach every delicious stratum.
Gluten-Free and Alternative Crust Ideas
Innovative crusts transform little mason jar creations into inclusive indulgences. Gluten-free cookies and nut-based crumbles offer a satisfying texture without traditional ingredients. These alternatives cater to dietary needs while maintaining the cute little charm that makes layered desserts irresistible.
Schär Honeygrams work beautifully as graham cracker substitutes. Crush them with brown sugar and melted butter for a sweet, sturdy base. For nut lovers, toasted almonds or pecans blended with maple syrup create rich layers that hold creamy fillings perfectly.
Texture matters most in alternative crusts. Use these binders to prevent crumbling:
| Base Ingredient | Binding Agent | Flavor Pairing |
|---|---|---|
| Oat flour | Coconut oil | Dark chocolate |
| Rice cereal | Peanut butter | Banana cream |
| Sunflower seeds | Date paste | Lemon curd |
Mini mason jar desserts shine with creative crusts. A Michigan baker shares: “Clients adore my sesame-coconut crusts under mango mousse—they’re crunchy and allergy-friendly.” Freeze bases for 15 minutes before layering to ensure stability.
Flavor balance elevates these adaptations. Add cinnamon to gluten-free cookie crumbs for warmth, or orange zest to almond crusts for brightness. These cute little tweaks preserve elegance while accommodating diverse preferences. The result? Little mason masterpieces that delight everyone at the table.
Whipped Cream and Topping Innovations
The final flourish of whipped cream transforms simple layers into showstopping creations. Light, airy textures balance rich fillings while adding visual height to jars perfect for gifting or display. Professional bakers recommend chilling mixing bowls and using cream with 36% fat content for peak stability.
Achieving fluffy consistency requires precise technique. Whip cold heavy cream on medium speed until soft peaks form, then gradually add sugar. For key lime variations, fold in zest after whipping to maintain brightness. A Seattle pastry chef notes: “Stabilized whipped cream holds layers intact for 8 hours, ideal for outdoor events.”
| Topping | Best Pairings | Occasion |
|---|---|---|
| Toasted Coconut | Mango curd jars | Tropical parties |
| Graham Cracker Dust | Chocolate mousse | Campfire themes |
| Citrus Sugar | Key lime parfaits | Summer brunches |
Garnishes elevate aesthetics without complicating recipes. Crushed peppermint adds holiday sparkle to chocolate layers, while fresh berries create natural color contrasts. For jars perfect as edible gifts, drizzle caramel sauce in spiral patterns before sealing lids.
Texture contrast remains crucial. Sprinkle graham cracker crumbs over whipped cream for crunch, or add chocolate shards between layers. A food stylist suggests: “Alternate white and dark chocolate curls vertically against the glass for 3D effects.” These finishing touches turn humble ingredients into memorable sensory experiences.
No-Bake Desserts for Special Occasions and Parties
Elevate your event spread with fuss-free creations that dazzle guests and simplify hosting. Portable glass servings shine at weddings, anniversaries, and milestone celebrations where presentation matters. Their format eliminates messy slicing while offering built-in portion control.
Angel food cake cubes layered with berry compote create light yet impressive options. For richer affairs, chocolate ganache alternates with espresso-soaked ladyfingers in tiramisu-inspired designs. Yogurt parfaits with honey-drizzled granola cater to health-conscious attendees without sacrificing elegance.
Three crowd-pleasing formulas stand out:
- Key lime pie jars with toasted meringue peaks
- Raspberry cheesecakes featuring mascarpone swirls
- Tropical mango-coconut yogurt parfaits
Prepare components 48 hours ahead—store crusts separately from fillings to maintain texture. Assemble layers 2-3 hours before serving for optimal freshness. Label jars with dietary tags (gluten-free, vegan) to streamline guest choices.
The real magic lies in customization. Match colors to event themes using edible flowers or tinted whipped cream. A Michigan bride shares: “Our key lime jars with turquoise ribbon accents perfectly complemented our beach wedding.” These edible centerpieces turn ordinary gatherings into unforgettable experiences.
Modern Twists on Traditional Jars
Classic desserts evolve through creative adaptations that honor their roots while embracing new techniques. Cake Jar Innovations blends nostalgic flavors with unexpected textures, like espresso-infused mascarpone or salted caramel swirls. These reinterpretations maintain the charm of original recipes while appealing to modern palates.
Traditional cracker crust bases now share the spotlight with alternatives like crushed pretzels or gluten-free oat blends. Mini pumpkin cheesecakes demonstrate this shift, pairing spiced fillings with cinnamon-dusted almond meal crusts. Modern versions often use layered components instead of blended mixtures, creating distinct flavor experiences in every spoonful.
| Traditional Element | Modern Upgrade | Prep Advantage |
|---|---|---|
| Graham Cracker Crust | Chocolate-Pretzel Base | Adds salty contrast |
| Plain Whipped Cream | Lavender-Infused Topping | Elevates aroma |
| Single-Layer Cheesecake | Striped Berry & Cream | Visual drama |
Current trends emphasize texture play and ingredient fusion. Evermine’s mason jar ice cream cake layers fudge brownie chunks with roasted pecans and vanilla bean cream. Food bloggers report 30% more engagement on posts featuring matcha-white chocolate jars compared to standard recipes.
Innovative assembly methods boost efficiency. Piping three-toned cream layers creates professional results in minutes. For seasonal flair, try alternating pumpkin mousse with ginger snap crumbs – a fall favorite that updates the classic cracker crust approach.
To Conclude This Dessert Jar Recipe
Layered creations in portable glassware redefine how we approach crowd-pleasing indulgences. Mason jars prove their worth beyond storage, offering a canvas for textures that balance crunch and creaminess. Whether crafting citrus-infused parfaits or decadent chocolate cake alternatives, these servings merge practicality with artistry.
Preparation often takes under 30 minutes, letting hosts focus on guest interactions rather than kitchen tasks. The guide’s tips—from stabilizing whipped cream to freezing crusts- ensure consistent results. Seasonal adaptability allows summer berries or autumn spices to shine through simple layering techniques.
These portable delights excel at events where presentation matters. Mason jars transition seamlessly from backyard barbecues to formal receptions, their airtight lids keeping contents fresh. Custom garnishes or themed labels add personal flair without extra effort.
Ready to experiment? Start with a cake-inspired base or yogurt-based parfaits, then layer in favorite flavors. The journey from ingredient assembly to Instagram-ready results takes mere minutes, proving elegance needn’t require complexity. Your next gathering deserves this blend of convenience and creativity.